Google Analytics 4 (GA4) is a powerful tool that can help website or app owners view their site’s or app visitors’ behavior. So, it can help you to view the number of visitors, their interactions with your site, time spent on each screen, their countries, devices used, and other different metrics which can help you to improve your website and attract more visitors. Most importantly, it is completely free! You can connect Google Analytics to your website or app. Therefore, in this article, we will show you how you can integrate Google Analytics 4 (GA4) into your WordPress website.
First, search “Google analytics” in Google or go to https://marketingplatform.google.com/about/analytics/.
Click “Get started today”
After clicking “Get started today”, you have to fill up different information in a few steps. Now, these steps are described below.
Step 1: Google Analytics 4 (GA4) Account Creation
Firstly, you have to provide a name for your account. Under this account, you can put your different websites. As a matter of fact, this is like an umbrella under which you can run analytics for your different business websites. So, for example, give a name like “My websites”.

Figure 1: Provide an account name
Here, you don’t need to change other settings. Now, click “Next”.
Step 2: Property Creation
Afterward, you provide the details of your website name, you time zone and local currency in this page (Fig. 2).
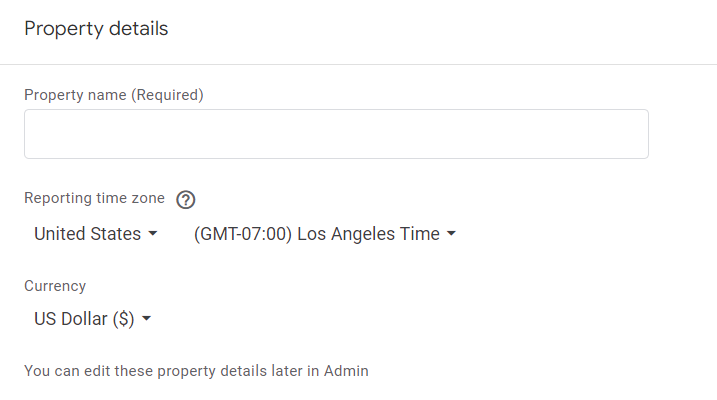
Figure 2: Website name, time zone, currency
After filling up the details, click “Next”.
Step 3: GA4 Business Details
Next, Google wants to know a bit about your business. Now, provide the details of your business here:
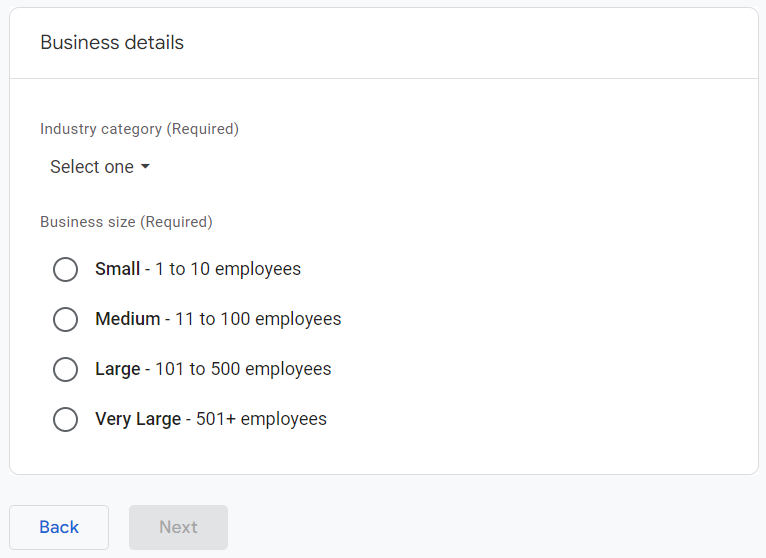
Figure 3: Business type and size
For example, you can choose “Other Business Activity” if your business type does not match here. After providing your details, click “Next”.
Step 4: Business Objectives
Afterward, you can use the top 4 or the bottom one.
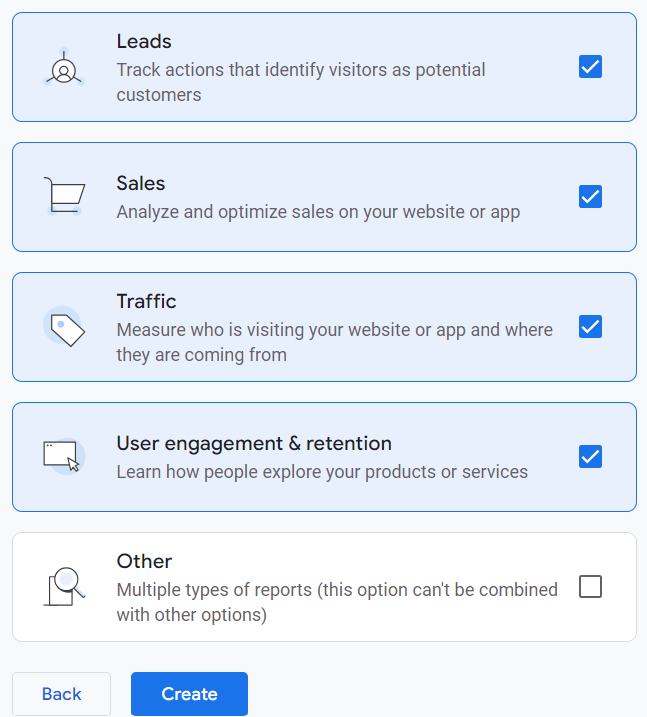
Figure 4: Business objectives
Here, you can select the top 4 and click “Create”.
Now, a pop-up will appear regarding the “Google Analytics Terms of Service Agreement”. Next, in this popup, select your country and click the checkbox of “I also accept the Data Processing Terms as required by GDPR. Learn more”.
Click “Accept”.
Step 5: Data Collection in Google Analytics
Select the platform type. Here, you choose “Web” for your website.
The following pop-up (Fig. 5) will appear:
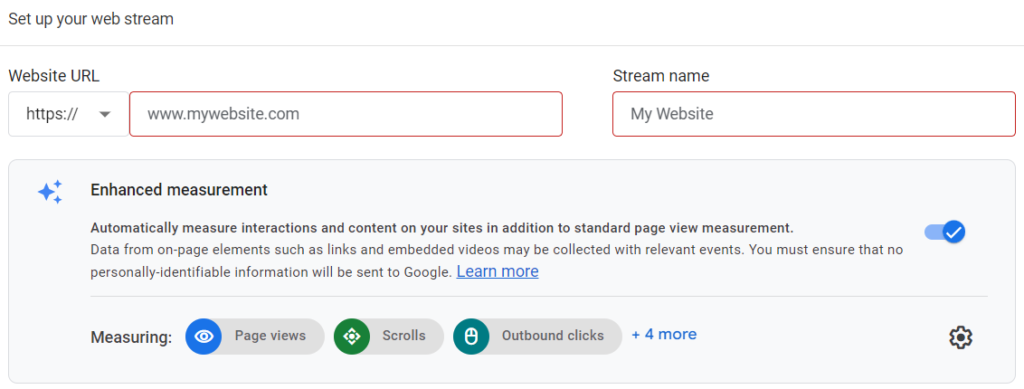
Figure 5: Website URL
Provide the URL of your website here and give a stream name to identify it later. For example, you can give “Sitename.com 2024”.
Now, click the “Create & Continue” button in the top-right corner.
From the following page, select “Install with a website builder or CMS”.
- Now, click “Select your platform”.
- For WordPress, select “Site Kit plugin”.
Now, log in to your WordPress account:
- Go to Plugins -> Add New Plugin
- Search “site kit”
- Click “Install Now” and “Activate” (Fig. 6)

Figure 6: Site Kit plugin in WordPress
Here, the following page (Fig. 7) will appear in your WordPress.

Figure 7: After installation of Site Kit in WordPress
Now click “Start setup”.
- Click the following checkbox:
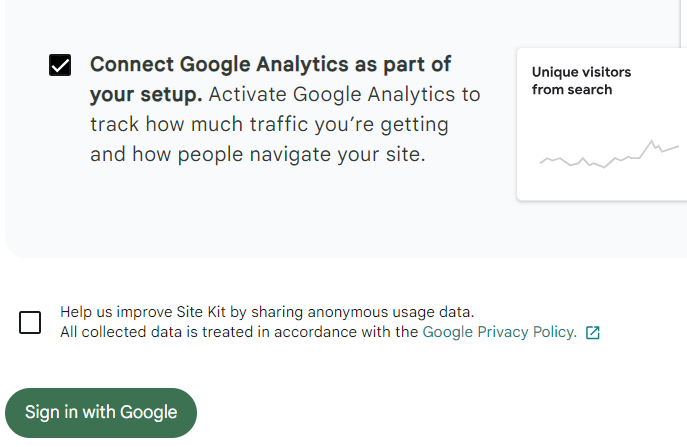
Figure 8: Connect Google Analytics
- Click “Sign in with Google”.
- Select your Google account.
- Select all from “Select what Site Kit can access” and click “Continue”.
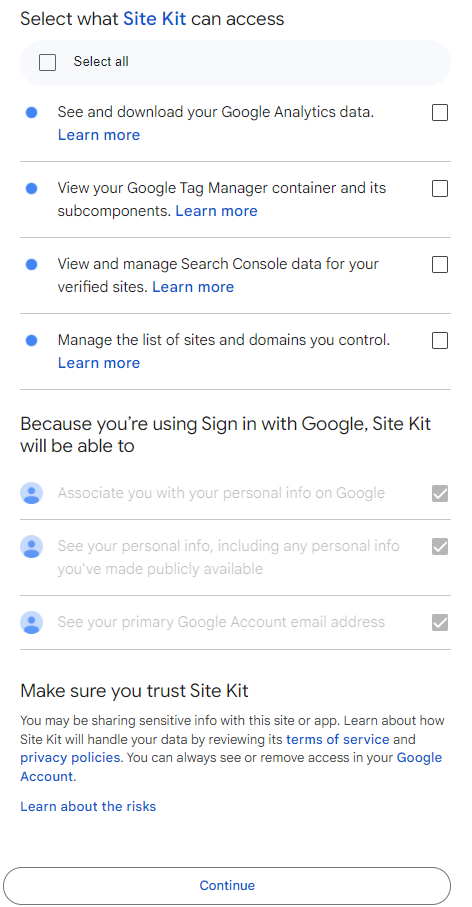
Figure 9: Select all for Site Kit
- Google may ask for the verification of the ownership of your website (Fig. 10)

Figure 10: Ownership
- Click “Verify”.
- Now, click “Allow” to “Turn on Metrics in your dashboard”.
- Click “Set up” for “Set up Search Console”.

Figure 11: Set up Google Analytics
- Click “Next” in this last step.
- Now, you will be taken to your WordPress account.
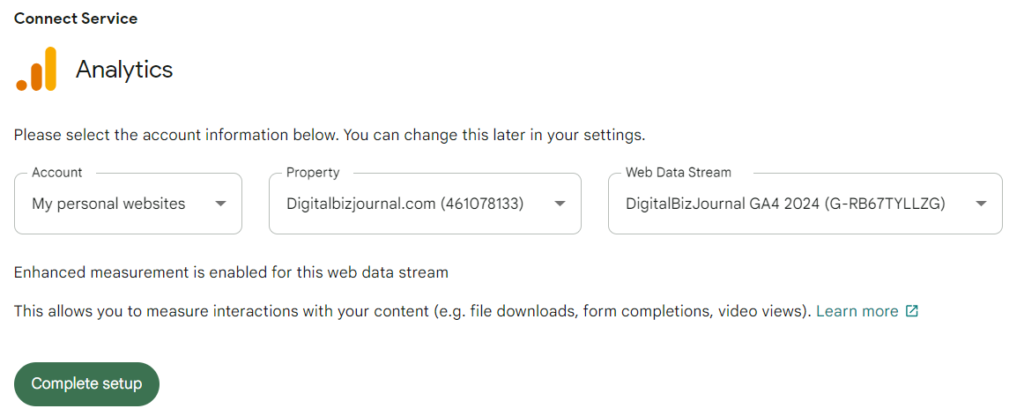
Figure 12: Complete setup
- Click “Complete setup”.

Figure 13: Setup is complete
Summary
Congratulations! You have completed your setup.
After integrating Google Analytics with your WordPress, it may take 24-48 hours to show the data. As a next step, you have to work on SEO of your website so that Google will rank your website.

